CONTENT DISCLAIMER
It should go without saying this, but I think it now needs to be said -- Please do not steal any of my content, including images and videos, to pass it off as your own creation in order to sell your own orgonite or other energy products on your own websites, social media outlets, Etsy shops, etc. This scenario continues to happen with my content, especially by (but not limited to) people in the new age community. If being a spiritual nomad and living in a van down by the river while waiting to ascend to the other side of the galactic rainbow bridge isn't giving you the materialism (cough)... excuse me... I mean if this isn't giving you the "abundance" lifestyle that you ramble-on about 24/7 to your cult followers, then perhaps you should use that creativity you're always bragging about as "cosmic downloads" and venture out to create your own content instead. Do the work, and stop mooching and pretending it's okay to steal my content and take credit just because "love and light." Fun fact: A thief and a prick is still a thief and a prick, regardless of how many times per day they use the term "namaste."
And if you're thinking I'm being rude or mean, then perhaps you're the problem. I've found people copy/pasting my material from social media posts, stealing my photos and videos (especially the videos where I'm not speaking, so you can't tell it's actually my footage at first), and then they swap-out one word like "Sedona" (because I often refer to what's happening in the sky above me in my own city, Sedona) and they replace the word with their own city's name. That's it, nothing else changed. I've found people copy/pasting my product descriptions from my tutorials and shop, then using them on their own store/product pages and social media to sell their own products without changing a single word, leading people to think they created the material, device, or product. I've also found people using my name in their Go Fund Me campaigns, lying to people and asking for money with campaigns saying "Support Mitch the Orgone Donor and Me on our orgonite gifting project;" and this was done by people whom I don't even know. Worse yet, after researching further, it became obvious the money they raised didn't even go toward Orgonite gifting, and the people who donated money thinking I was involved had no idea that I had absolutely nothing to do with it. The bastards just conned people out of money. If it's not here on my own website, I have nothing to do with it.
These are just a few instances from a plethora of nonsense that continues to happen over the years. It sucks beyond sucking when others take my hard work and creativity and then use it to greedily and deceptively make a quick buck. This completely devalues and negates my work and what I'm trying to do to help the Earth. Please don't do this. There are more than enough parasites already existing throughout this realm; we don't need more.
If you want to help support my work and my mission, please direct people to my website directly. If you want to go a step further, please consider visiting my shop and grab yourself something nice to protect your home. Thank you. Rant out.
Cheers,
Mitch
Instructions for Building Your Own Devices
All content on this page is for educational and entertainment purposes only. I am not a doctor, and the information I share regarding Orgone energy is not to be taken as any form of medical advice, nor is it meant to be used to treat or diagnose any medical condition, disease, ailment, or other heath-related issue known throughout the entire universe. If you understand how and why Wilhelm Reich was destroyed by the FDA, this disclaimer will suffice. If you still have questions about this disclaimer, then please find a new hobby; this one isn't for you.
Additionally, I do not create or manufacture Orgonite for sale. I create orgone energy devices. The term Orgonite was trademarked by an alleged parasitic government shill. For details about that nonsense, visit my Orgone Energy page. For questions about Chembuster building, email me at [email protected]. I'm always happy to help others combat this nonsense, especially those people taking action to help themselves!
***SAFETY NOTE***
Don't be the person who's responsible for the warning on hair dryers that says "DO NOT USE THIS DEVICE IN THE BATH TUB."
Catalyzing resins have a varying range of toxicity until cured, and the fumes can be hazardous to breathe, as well as corrosive and oxidizing to the skin if you come into direct contact. Please use caution and proceed at your own risk. Also, be sure to follow the manufacturer's instructions and use safety gear, including some form of protective wear for your hands (rubber or nitrile gloves), and a proper respirator for the task at hand. I use a 3M 6300 series, which includes carbon filters for organic solvents and fumes, as well as filters for particulate matter (which comes in handy if you plan to sand/polish the final pieces). Always make sure to allow for proper ventilation when using resin materials.
Resin also gets very hot while curing, so I'm not responsible if you burn yourself. But then again, it sounds like you're not responsible if you burn yourself either... because you had fair warning and yet you still managed to do it.
Continue reading below for instructions on chembusters, earth pipes, and towerbusters.
How to Build an Orgone Chembuster
|
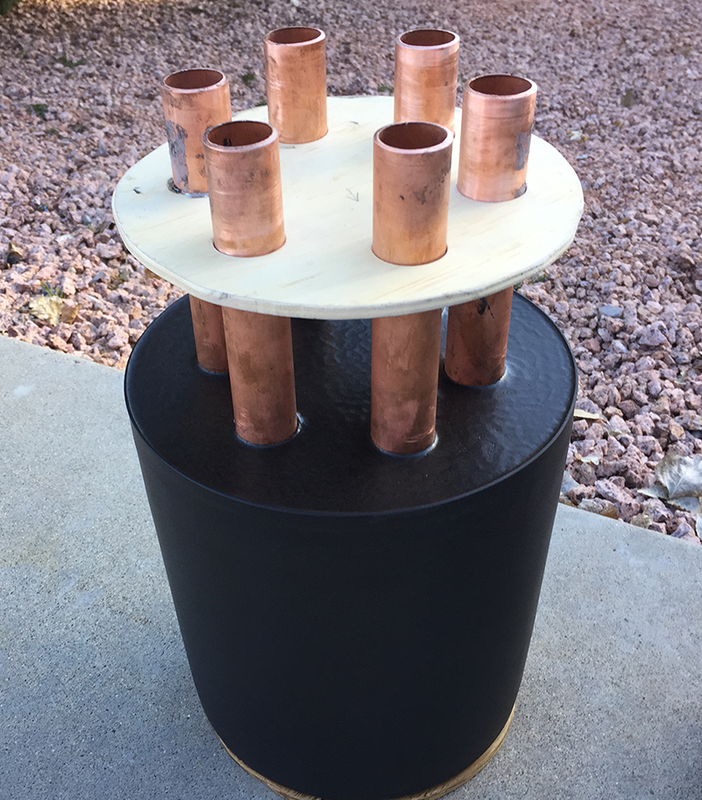
Click below to download PDF instructions for creating your own Chembuster. I have included detailed instructions for three models; which include the traditional Don Croft CB (the standard of all CBs), the slighly-more budget friendly Induction CB with aluminum pipes (a lesser-known model that still packs a punch), and my own experimental Succor Punch CB (with a built-in Succor Punch radionics device inside).
Click below on the chembuster of your choice. Additional Notes:
If You Would Prefer to Purchase a Chembuster: If you're interested in buying a chembuster as opposed to making your own, I highly recommend CTBusters.com, where you can purchase a Chembuster kit from Andy for the lowest price I've seen in the USA anywhere in all the years I've been working with these devices. If you're outside from the USA, I also recommend Orgonise Africa for Georg's model of chembuster/cloudbuster devices. |
How to Make Orgone Earth PipesThe following video is a tutorial on how to make Orgone earth pipes. Additional notes regarding the tutorial may be included below.
Additional Notes:
|
|
How to Make Orgone Towerbusters
|
The following is a tutorial on how to make traditional and tactical Orgone towerbusters.
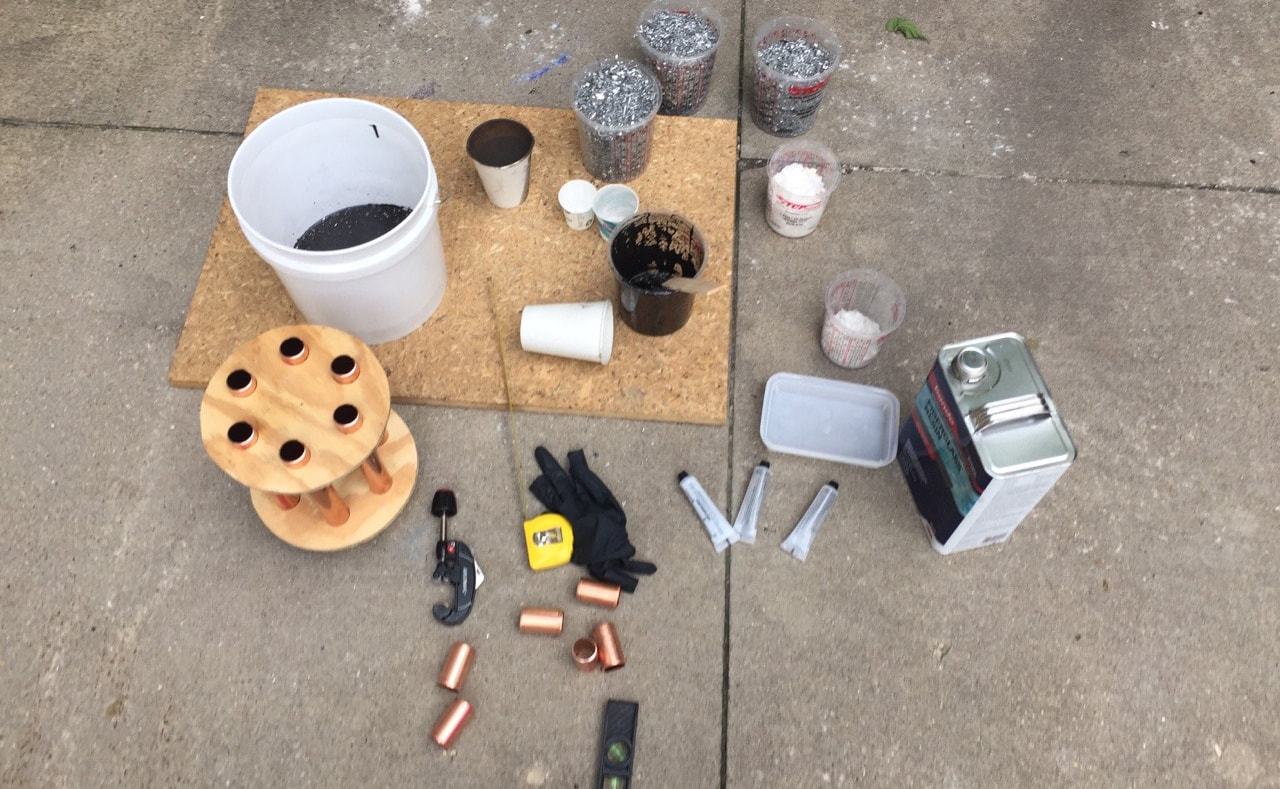
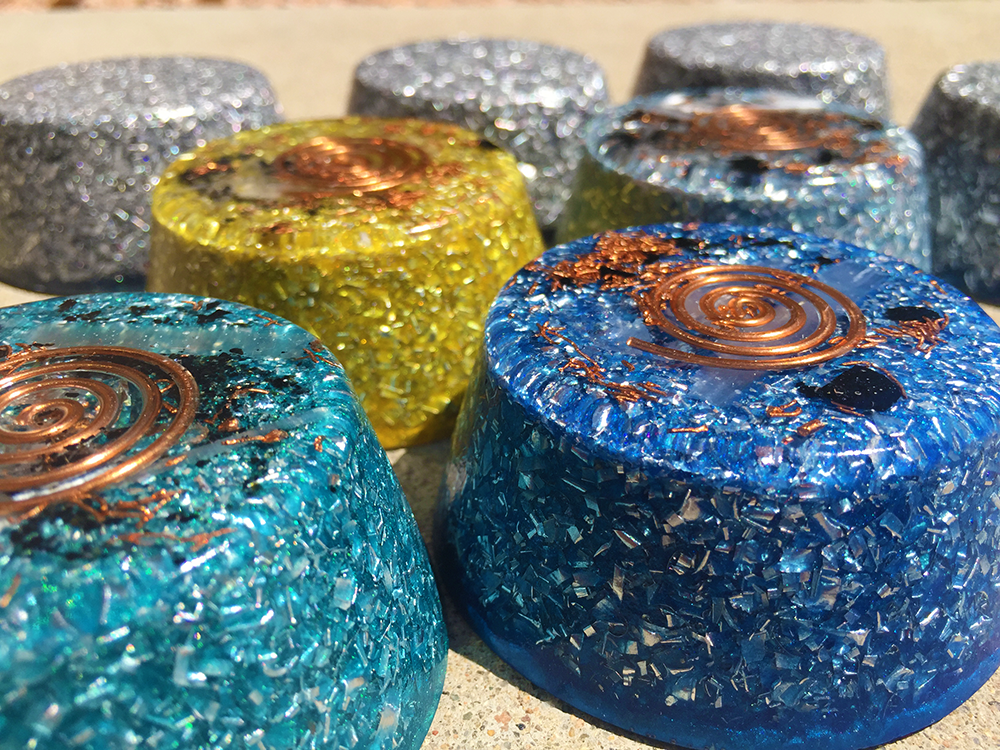
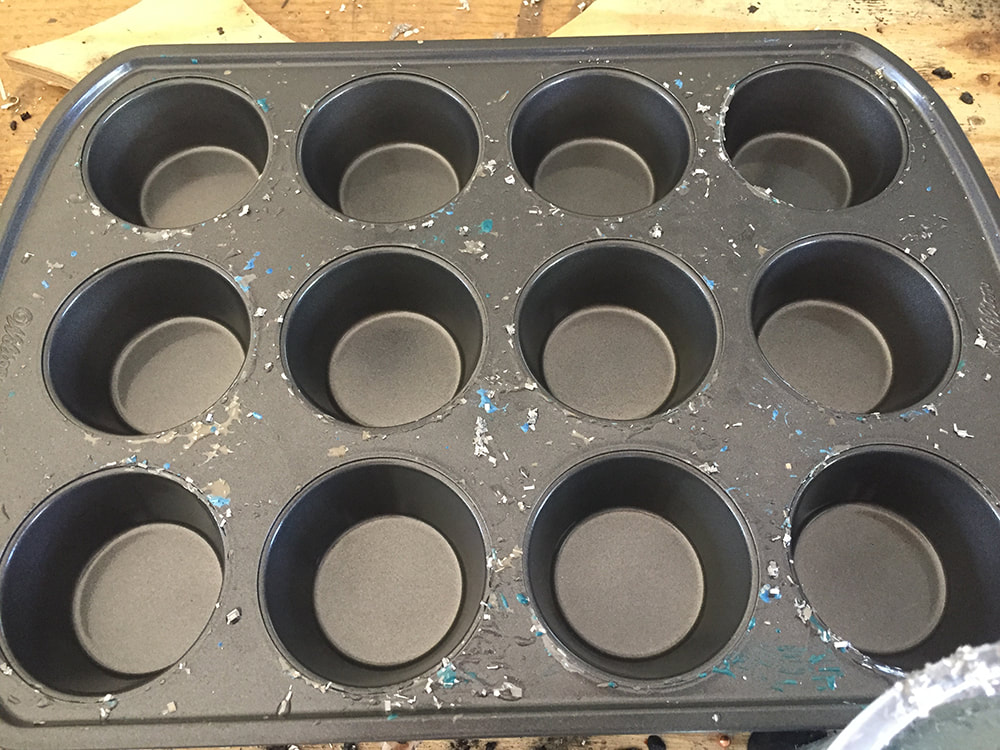
The basic recipe for traditional orgone devices is a 1:1 mixture of catalyzing resin and metal shavings with the addition of some form of quartz crystals. The following is specific to towerbusters. If it's your first time working with resin or making Orgone devices, start with something simplistic like Bondo Fiberglass Resin. While some are not a fan of the amber color of the resin, the instructions and catalyst make it easy to use and fairly foolproof. The average cost of Bondo per one-gallon container is approximately $50 (as of January 2022). One gallon, if used correctly, should be enough to create approximately 40 to 48 towerbusters, depending on other factors, such as the density and volume of the metal components, crystals, and the size of the mold being used. The general consensus in the Orgone community is that a towerbuster should be approximately three ounces or more, which is easy to accomplish when using the tried-and-true muffin pan method. Yes, those hockey pucks you see are created by some form of muffin or cupcake mold. PS, Orgonite is not edible, so please do not eat it (there's always that one person)... |
Aluminum is considered the optimal metal for making tactical towerbusters for a few reasons. It's lightweight, easily accessible, budget-friendly, and versatile. If you're planning to bust a large number of towers, you'll be thankful you used aluminum when carrying 100 towerbusters inside a backpack or on your bike. Other common metals can include brass, steel, iron, and copper, although copper shavings are quite expensive, and I personally don't recommend using them for tactical towerbusting pieces that you plan to gift or bury. Copper is an excellent energy conductor, but again, if you've ever been out in the field busting towers strategically, you understand why light weight devices are key.
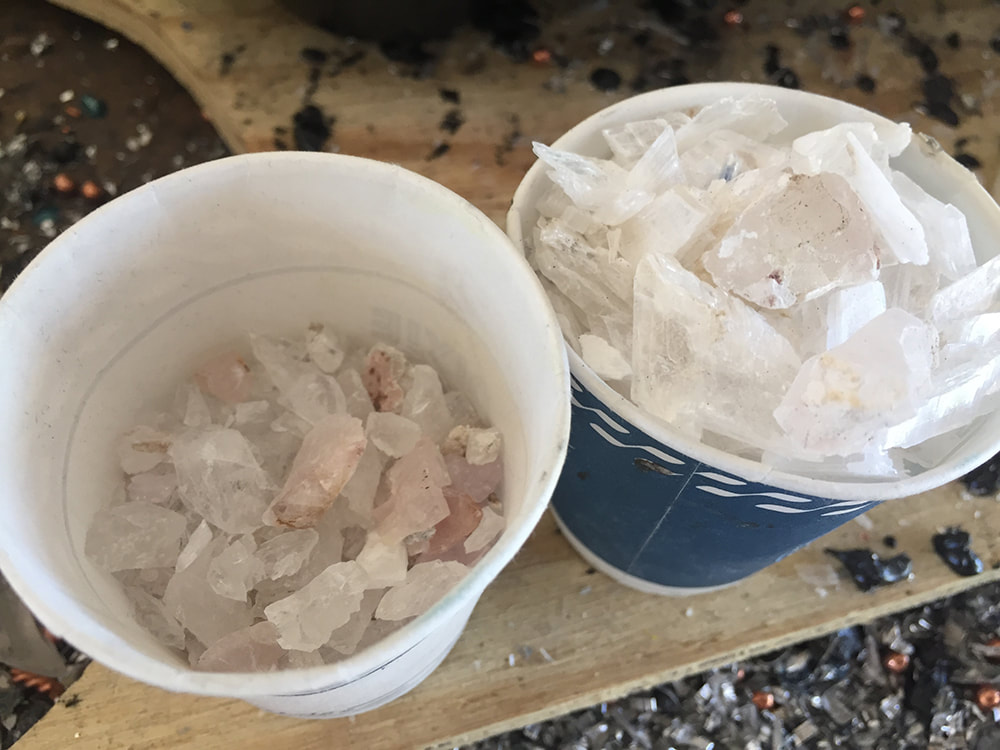
The quartz crystals may be terminated points (which just means one or both sides have a definitive point, whether natural or artificially cut), but terminated pieces are not required for functional Orgone devices like towerbusters, however, earth pipes, do require at least one small terminated quartz point, as the point will direct the energy into the ground when the pipe is buried accordingly. Visit my tutorials page to learn more about earth pipes.
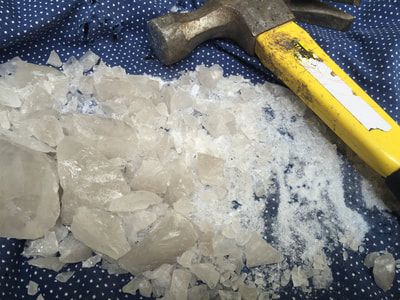
The quartz component may consist of larger pieces you've broken with a hammer (use a cloth if doing this), as well as pebbles, shards, sand, or dust. If using sand, it should be from quartz that you crushed yourself. Do not use quartz sand from the home repair store (used for concrete and other home projects) because it is not entirely the same thing as quartz (silicon dioxide). It has fillers of other cheap material. While quartz crystals are the standard, most Orgone workers including myself will also add other elements, such as selenite powder, usually crushed into fragments and small pieces, or in some cases crushed into dust. Selenite is not required for functional Orgone devices. The idea stems from the community of gifters over the last two decades and the idea of Selenite being an excellent energy field cleaner. Many will interpret this to mean Orgone devices need to be cleaned; however, it does not mean that at all. The practice of cleaning Orgone devices, grounding them, washing with water, or incorporating cleansing crystals in addition to quartz is really just a matter of personal preference. If someone tells you that Orgone devices require cleaning, then I don't think they're making Orgonite, because it is already a self-cleaning energy device (assuming it's constructed properly).
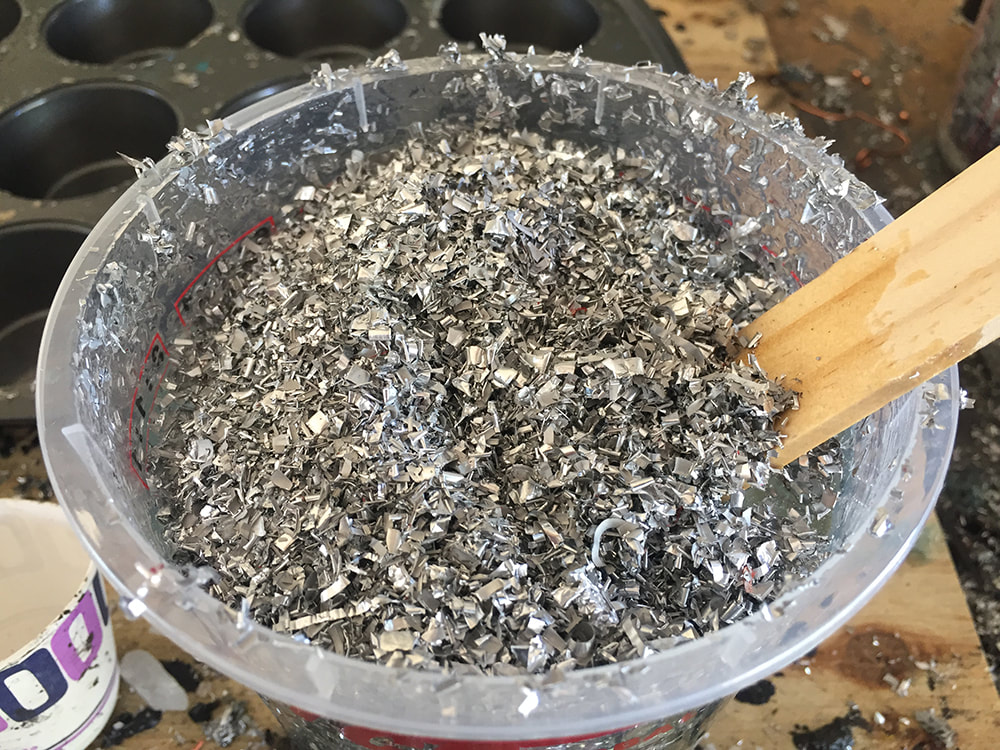
In the examples below, I highlight the method for tactical-based towerbusters using aluminum shavings. The specific aluminum material I use is a bit smaller than standard shavings, almost more like fleck, which makes it fluffier than other metal shavings such as iron, which are more dense. The resin/metal rule (50 percent resin, 50 percent metal shavings) is primarily measured in volume, not weight. This makes sense when the metal is lighter and takes up more volume. The standard towerbuster is about three to four ounces, so if measuring by weight then that would be more aluminum than could physically fit inside the muffin pan mold. While the three ounce rule is important, sometimes you will have to "eye-ball it." I have made towerbusters using copper shavings too, and while they are a fantastic material for producing solid and strong Orgone devices, it takes a lot of copper shavings to fill the same volume of the muffin cavity if using only copper. For this reason, you don't want to use copper for large-scale gifting unless your budget is massive. If you want a top-notch copper shavings distributor, let me know and I'll send you their information. Be warned, it comes with a hefty price tag.
***SIDE NOTE: Check with your local key cutters, locksmiths, and brake repair shops for brass and iron, and check with fabricators and manufacturers for aluminum. In my experience, people love helping and will throw you a bone if you tell them it's for a science project. In my experience, this is not true if you say it's for an art project. Someone will inevitably ask, so just be honest. I always told people in Chicago that I was making technology devices for protecting people from the harmful effects of cell towers and EMF radiation. Throw out Tesla's name too. The response was always positive, even if they didn't have shavings or other metals to give me. In honesty, you're helping the planet. There's no negative way to cut this planetary pie.
Making Orgone Towerbusters (the Muffin Pan Process)
Because my own aluminum source includes fleck that is smaller than regular shavings, this method can vary and it's best for the individual to use their own judgment in how the material is mixed together. Sometimes you will fill a mold with metal and then pour resin over the top to fill in the gaps and equal out. Other times you will mix the resin and metal together into a sludge using a mixing container (I call it the milkshake method) and then dump the entire mixture into the mold at the same time. You then place crystals inside. Read below for specifics. The overall point is you want a mixture of resin and metal to be cast in a mold and for some form of quartz to be embedded within the mixture.
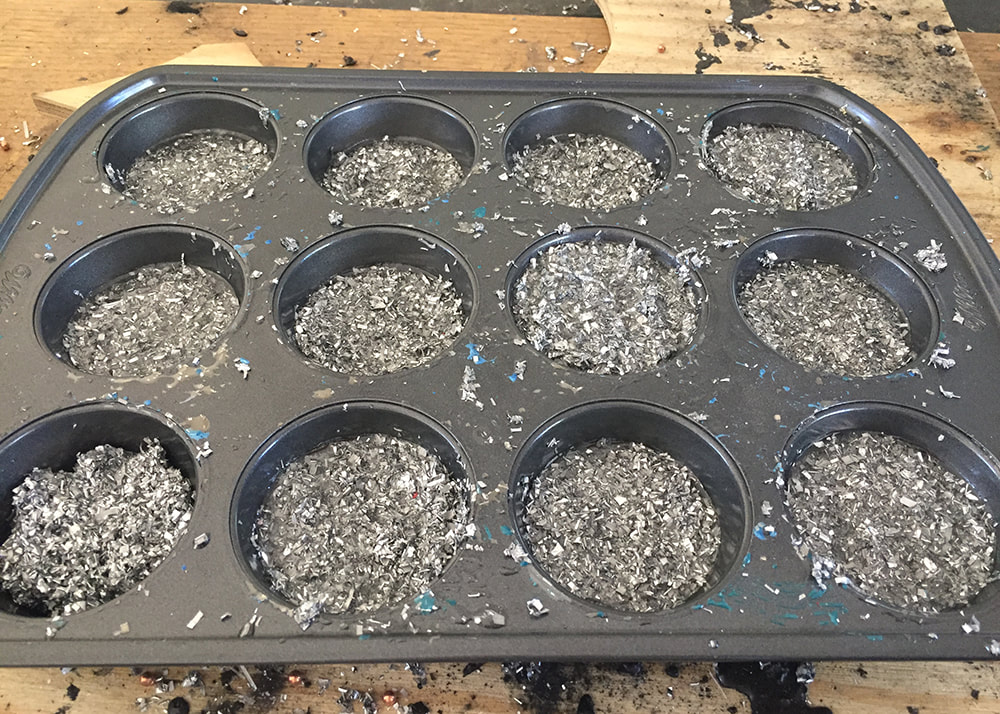
1. Fill each cavity about half-way with the metal shavings. This works best when your shavings are larger, like pencil sharpener shavings or turnings.
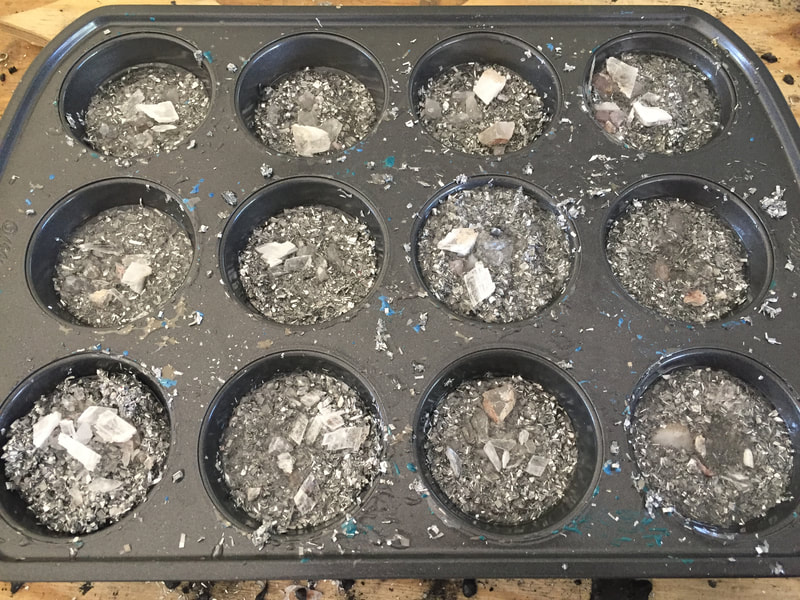
2. Add a few nuggets or pebbles of crushed quartz. It doesn't need to be much. Imagine a scoop approximately the size of a 1/2 teaspoon or the equivalent of a 5-10 BBs or mini ball bearings. You can add more, but it's not necessary.
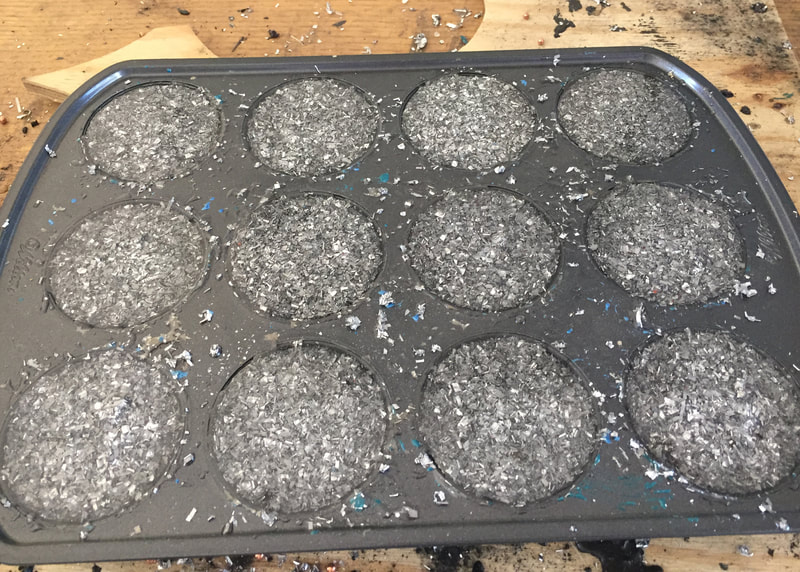
3. Top off each cavity with a little bit more aluminum shavings so that it is level or close to level with the top of the muffin cavity. Don't shake the pan or level-out the shavings too much or the pile will become too dense to let resin pass through it when you pour it over the top.
4. Using an appropriate mixing container (like pain cups from the hardware store), mix your resin with the catalyst according to the makers' instructions. Many orgone workers would have you believe this is simple, and for the most part it is; however, resin will behave differently in certain environments. It is easily affected by temperature, humidity, and the other elements that are mixed in the mixture. If the temperature is below 70 degrees, you will need to use a little bit of extra catalyst solution (5-10 drops per quart of resin used, so not too much). If you're making your devices in temperatures above 70 degrees, just follow the instructions, and if using resin during a full-blown heatwave then try adding slightly less catalyst than needed so it doesn't harden to quickly or overheat and crack (If you're working quickly, then you don't have to add less, just be prepared to work quickly. Once you mix the catalyst, the resin will thicken and begin to cure in about 5-7 minutes. On a super hot day or when the resin starts out warmer prior to mixing due to higher ambient temperatures, then it will begin to thicken and cure in about 3-5 minutes. In my experience, working with resin is a guess and check process. It's not a huge learning curve, but there's still a small curve. It's just part of the process.
***Please Note: If you're mixing the resin and metal together as a whole before pouring it into the mold, the general rule is approximately 32 ounces of resin per dozen towerbusters. This is my personal method, and I use 32 ounces (volume) in aluminum shavings mixed together. The mixture is very thick, almost "too thick," to stir, but when scooped into the muffin pan/mold it levels out.
The Standard Method (for larger metals shavings)
This method involves filling the mold with shavings about half way, then placing your crystals on top, then covering with more metal shavings, and then pouring the resin over the entire mold cavity, which fills in the gaps. When you use this method, pour slowly and let it seep into the gaps before pouring more.
This method involves filling the mold with shavings about half way, then placing your crystals on top, then covering with more metal shavings, and then pouring the resin over the entire mold cavity, which fills in the gaps. When you use this method, pour slowly and let it seep into the gaps before pouring more.
The Milkshake Method
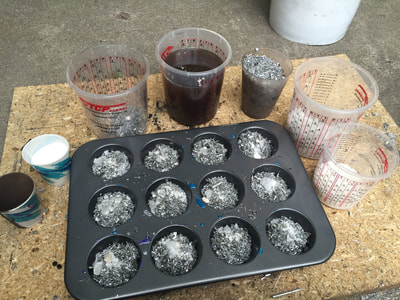
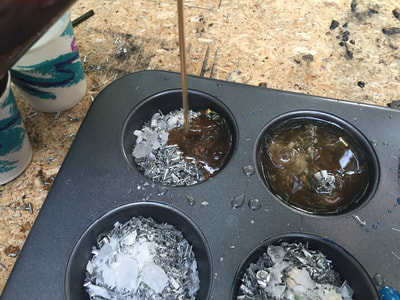
This is my preferred method because my shavings are smaller like fleck, and the standard method would not work because there aren't small enough gaps between the aluminum to simply pour the resin over the top. This is the method that includes mixing your metal and resin together first, then dumping it into the pan. As seen in the images below, sometimes you will pour it into the pan, only to find that there's a bit too much resin and more metal can be added to your cup mixture, before dumping more into each cavity.
This is my preferred method because my shavings are smaller like fleck, and the standard method would not work because there aren't small enough gaps between the aluminum to simply pour the resin over the top. This is the method that includes mixing your metal and resin together first, then dumping it into the pan. As seen in the images below, sometimes you will pour it into the pan, only to find that there's a bit too much resin and more metal can be added to your cup mixture, before dumping more into each cavity.
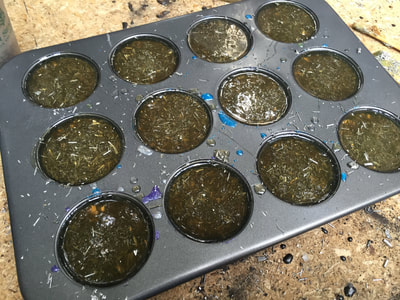
5. Once mixed, and working very quickly, pour the resin into each cavity, only filling them about half way before moving on to the next one. Do this for each of the cavities. The resin should sink down into the metal so that by the time you finish the last one, you can go back to the first and pour some more, this time filling each cavity to the top so it's level inside and the metal shavings are completely submerged. I always recommend having a wooden skewer or thin stick no thicker than a pencil to lightly stir each cavity and shift the mixture so that the resin and metal are evenly distributed.
6. Once everything is level, carefully place the pan or mold on a heat-safe surface. Resin cures at a very high temperature, so check the manufactures' label to confirm the temperature and curing time. If it's cooler than 70 degrees outside, place the pan out in a warmer area without direct breeze. I make most of my devices in cooler climates, so in the winter, I place my pans and molds inside cardboard boxes, sometimes also placing in the garage (with ventilation of course). If you make a lot of Orgone devices year-round, you'll get familiar with juggling a space heater with this process if needed.
7. After the resin hardens and cools, it should pop out of the mold with a slight tap on the back or a good slap on the ground. If the pan is metal, sometimes the pieces will pop loose on their own. If using silicone, you will need to pop and peel it out of the mold when cured. Some orgone workers use silicone molds, others use metal. I prefer metal for towerbusters and I get about ten batches before any surfaces start to wear. Silicone varies, and in my experience it leaves a sticky feeling on the busters unless the resin is a higher quality casting style resin. When using something simple like Bondo, I don't recommend silicone molds unless the towerbusters are strictly for gifting. Silicone also attracts and maintains nasty chemical smells either from the resin or from the silicone being heated at such high temperatures. In my experience, metal does not do this. I also use metal because it's easier to work with if things go wrong since the metal structure supports itself and doesn't need a support surface or board underneath.
PLEASE BE ADVISED - Orgone devices can be made several different ways, and this is just one way to make them, specifically for tactical pieces that aren't as fancy. There are many variables that will change the process, including the types of metal, size of shavings, the incorporation of metal powders, muffin pan or other mold sizes and shapes, embellishments being added (such as special rocks or wire coils), and a handful of other variables that a habitual Orgone worker will encounter over time. One example of this is the process above, but instead using smaller aluminum shavings. Sometimes my metal shavings are too small that if I dump them straight into a mold and then pour the resin over the top, the shavings are too small, and therefore too dense to allow resin to pass through. For this reason, the process changes in that I have to add the shavings directly to the resin/catalyst mixture in a large plastic container or small bucket, and stir them together, creating a gloppy milkshake consistency. Then I pour the full mixture into each mold, then drop-in my crystals, then I proceed to give each mold cavity a light stir as I push the crystals deeper into the mold.
Other Downloads
The following downloads include informational cards and other tools for sharing via print or digitally.
Did you find this Helpful?
If you find my website and research helpful, please consider making a donation toward my gifting efforts. The materials, labor, prep work, and execution of these large-scale gifting efforts is not easy, and it's definitely not cheap. All of my gifting efforts come directly from my own pocket, including the funds from the sales from my shop. If you're feeling generous, let me know, because I'd love to hear from you!
Thank you for your support!
Mitch
Thank you for your support!
Mitch
